Generating Primitive Shapes in C++
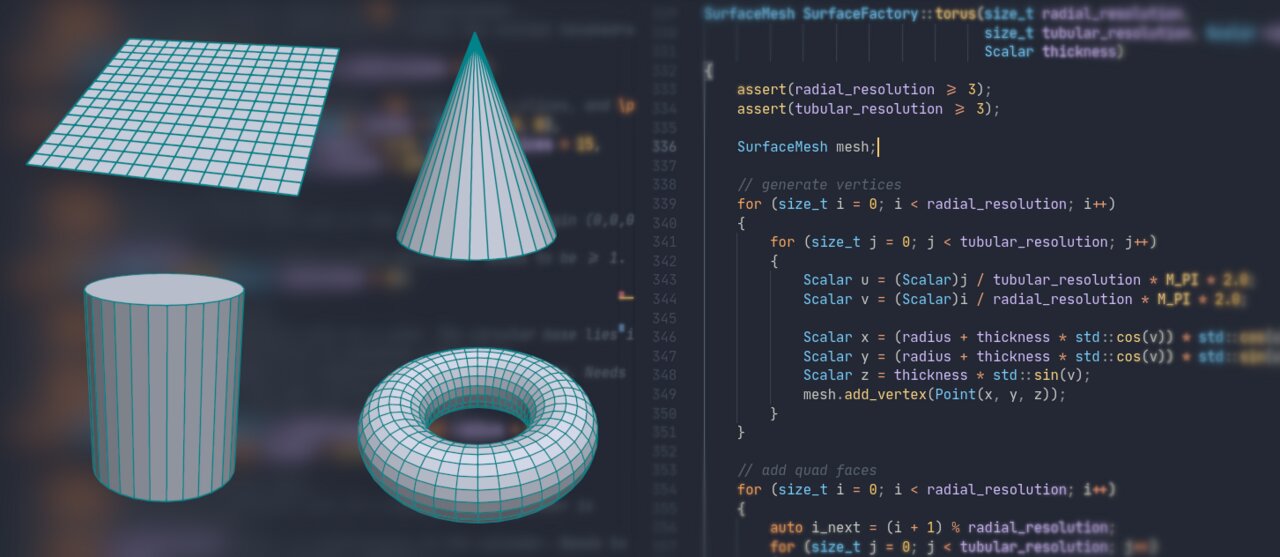
This is the last part of my brief series on procedural mesh generation of simple shapes in C++. The two previous articles covered generating Platonic solids and different types of spheres. I recommend reading the other articles first, especially if you want to try out the code yourself.
This part covers the following primitives:
- Plane
- Cone
- Cylinder
- Torus
As with the previous articles, the code is in C++, using the PMP library, and written with a focus on simplicity. I only expose a minimal set of options and don’t really optimize for performance. However, you can easily extend the code to control additional properties such as position, size, and orientation.
The Plane
Let’s start with the simplest shape, the plane. In the most trivial case, this is just single quad with four vertices lying in the plane:
SurfaceMesh plane()
{
    SurfaceMesh mesh;

    // add vertices in x-y plane
    auto v0 = mesh.add_vertex(Point(0,0,0));
    auto v1 = mesh.add_vertex(Point(0,1,0));
    auto v2 = mesh.add_vertex(Point(1,1,0));
    auto v3 = mesh.add_vertex(Point(1,0,0));

    // add face
    mesh.add_quad(v0,v1,v2,v3);

    return mesh;
}
While the above is fine for basic applications, you typically want to be able to refine the mesh into smaller elements, such as shown in the sequence below.
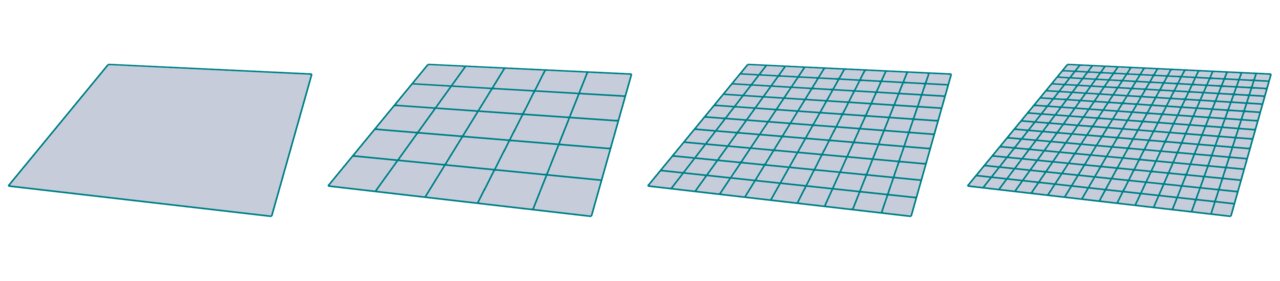
Generating such a regular grid isn’t that much more complicated. All you need is two nested for loops to generate vertices and faces. For the sake of simplicity, I fix the resolution to be the same in each direction.
SurfaceMesh plane(size_t resolution)
{
  SurfaceMesh mesh;

  // generate vertices
  Point p(0, 0, 0);
  for (size_t i = 0; i < resolution + 1; i++) {
    for (size_t j = 0; j < resolution + 1; j++) {
      mesh.add_vertex(p);
      p[1] += 1.0 / resolution;
    }
    p[1] = 0;
    p[0] += 1.0 / resolution;
  }

  // generate faces
  for (size_t i = 0; i < resolution; i++) {
    for (size_t j = 0; j < resolution; j++) {
      auto v0 = Vertex(j + i * (resolution + 1));
      auto v1 = Vertex(v0.idx() + resolution + 1);
      auto v2 = Vertex(v0.idx() + resolution + 2);
      auto v3 = Vertex(v0.idx() + 1);
      mesh.add_quad(v0, v1, v2, v3);
    }
  }

  return mesh;
}
If you’re curious to experiment with the code, go ahead and de-couple the resolution for the different plane directions, or add options for position, size, and orientation.
The Cone
Next, let’s have a look at a slightly more complex shape, the cone. A cone basically consists of a circular base connected to a single tip or apex.

The coarsest approximation to a cone is a tetrahedron (the leftmost image above), which you already saw in the tutorial about Platonic solids.
The code for generating a cone follows the same pattern that you are familiar with by now: Generate vertices first and then connect the faces.
For generating vertices, I sample a circle in the x-y plane, controlled by parameters for resolution and radius. I offset the tip vertex in z direction by height and add it last.
Adding faces is as simple as connecting two consecutive vertices from the base circle to the tip vertex. Finally, I add a single polygonal face to close the bottom of the cone.
SurfaceMesh cone(size_t resolution,
                 Scalar radius,
                 Scalar height)
{
  SurfaceMesh mesh;

  // add vertices subdividing a circle
  std::vector<Vertex> base_vertices;
  for (size_t i = 0; i < resolution; i++) {
    Scalar ratio = static_cast<Scalar>(i) / (resolution);
    Scalar r = ratio * (M_PI * 2.0);
    Scalar x = std::cos(r) * radius;
    Scalar y = std::sin(r) * radius;
    auto v = mesh.add_vertex(Point(x, y, 0.0));
    base_vertices.push_back(v);
  }

  // add the tip of the cone
  auto v0 = mesh.add_vertex(Point(0.0, 0.0, height));

  // generate triangular faces
  for (size_t i = 0; i < resolution; i++) {
    auto ii = (i + 1) % resolution;
    mesh.add_triangle(v0, Vertex(i), Vertex(ii));
  }

  // reverse order for consistent face orientation
  std::reverse(base_vertices.begin(), base_vertices.end());

  // add polygonal base face
  mesh.add_face(base_vertices);

  return mesh;
}
The Cylinder
Next, let’s have a look at cylinders which are barely more complicated than cones. To be more precise, I consider discrete approximations to a cylinder which are prisms, i.e., n-sided polygonal base faces parallel to each other connected by n other quadrilateral faces joining the two base faces.
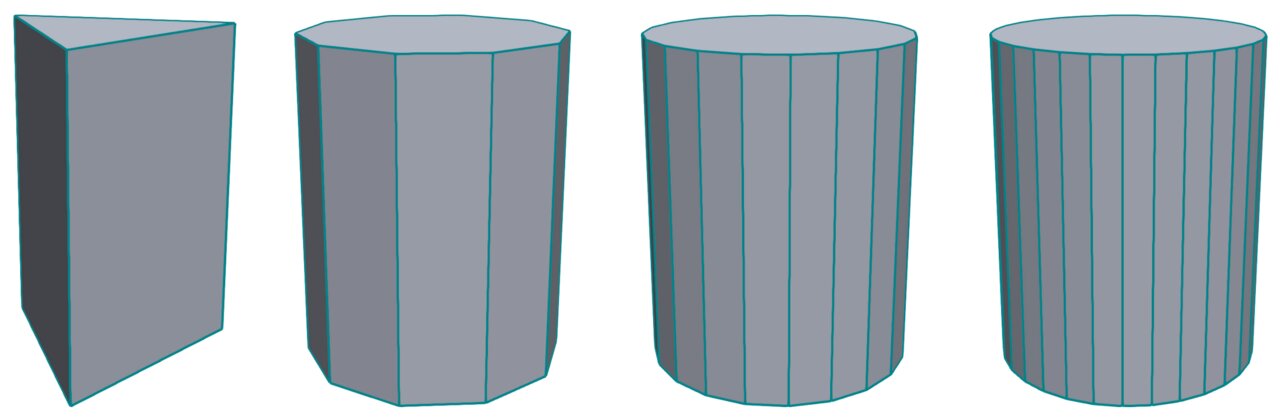
Generating a cylinder is very similar to generating a cone as described above. The major difference is that I sample two different base circles and generate quadrilateral faces connecting pairs of vertices from those two circles.
SurfaceMesh cylinder(size_t resolution,
                     Scalar radius,
                     Scalar height)
{
  SurfaceMesh mesh;

  // generate vertices
  std::vector<Vertex> bottom_vertices;
  std::vector<Vertex> top_vertices;
  for (size_t i = 0; i < resolution; i++) {
    Scalar ratio = static_cast<Scalar>(i) / (resolution);
    Scalar r = ratio * (M_PI * 2.0);
    Scalar x = std::cos(r) * radius;
    Scalar y = std::sin(r) * radius;
    Vertex v = mesh.add_vertex(Point(x, y, 0.0));
    bottom_vertices.push_back(v);
    v = mesh.add_vertex(Point(x, y, height));
    top_vertices.push_back(v);
  }

  // add faces around the cylinder
  for (size_t i = 0; i < resolution; i++) {
    auto ii = i * 2;
    auto jj = (ii + 2) % (resolution * 2);
    auto kk = (ii + 3) % (resolution * 2);
    auto ll = ii + 1;
    mesh.add_quad(Vertex(ii), Vertex(jj), Vertex(kk), Vertex(ll));
  }

  // add top polygon
  mesh.add_face(top_vertices);

  // reverse order for consistent face orientation
  std::reverse(bottom_vertices.begin(), bottom_vertices.end());

  // add bottom polygon
  mesh.add_face(bottom_vertices);

  return mesh;
}
The Torus
The final shape I’ll describe in this tutorial is the well-known torus or doughnut shape. A torus is generated by revolving a circle in three-dimensional space about an axis that is coplanar with a circle.

The code pattern remains the same: Vertex generation comes first, then add the corresponding faces. The indexing of the faces gets a bit more tricky due to the nested for loops, but that’s basically about it. I use some intermediate variables to make the code clearer, hope this helps.
SurfaceMesh torus(size_t radial_resolution,
                  size_t tubular_resolution,
                  Scalar radius,
                  Scalar thickness)
{
  SurfaceMesh mesh;

  // generate vertices
  for (size_t i = 0; i < radial_resolution; i++) {
    for (size_t j = 0; j < tubular_resolution; j++) {
      Scalar u = (Scalar)j / tubular_resolution * M_PI * 2.0;
      Scalar v = (Scalar)i / radial_resolution * M_PI * 2.0;
      Scalar x = (radius + thickness * std::cos(v)) * std::cos(u);
      Scalar y = (radius + thickness * std::cos(v)) * std::sin(u);
      Scalar z = thickness * std::sin(v);
      mesh.add_vertex(Point(x, y, z));
    }
  }

  // add quad faces
  for (size_t i = 0; i < radial_resolution; i++) {
    auto i_next = (i + 1) % radial_resolution;
    for (size_t j = 0; j < tubular_resolution; j++) {
      auto j_next = (j + 1) % tubular_resolution;
      auto i0 = i * tubular_resolution + j;
      auto i1 = i * tubular_resolution + j_next;
      auto i2 = i_next * tubular_resolution + j_next;
      auto i3 = i_next * tubular_resolution + j;
      mesh.add_quad(Vertex(i0), Vertex(i1), Vertex(i2), Vertex(i3));
    }
  }

  return mesh;
}
Closing Remarks
This finishes my brief series on procedural mesh generation of simple shapes. Together with part I and part II this should provide you with a solid basis for creating simple shapes in a modeling application or to test an algorithm against shapes with known properties.
The complete code is available as well. In order to try it out, just copy the file to src/MyViewer.cpp in the PMP project template, build the project, and run the ./myviewer executable.
Comments or questions? Simply drop me a mail.